The Ultimate Speed Solution for WordPress
Free Your
Server Disk
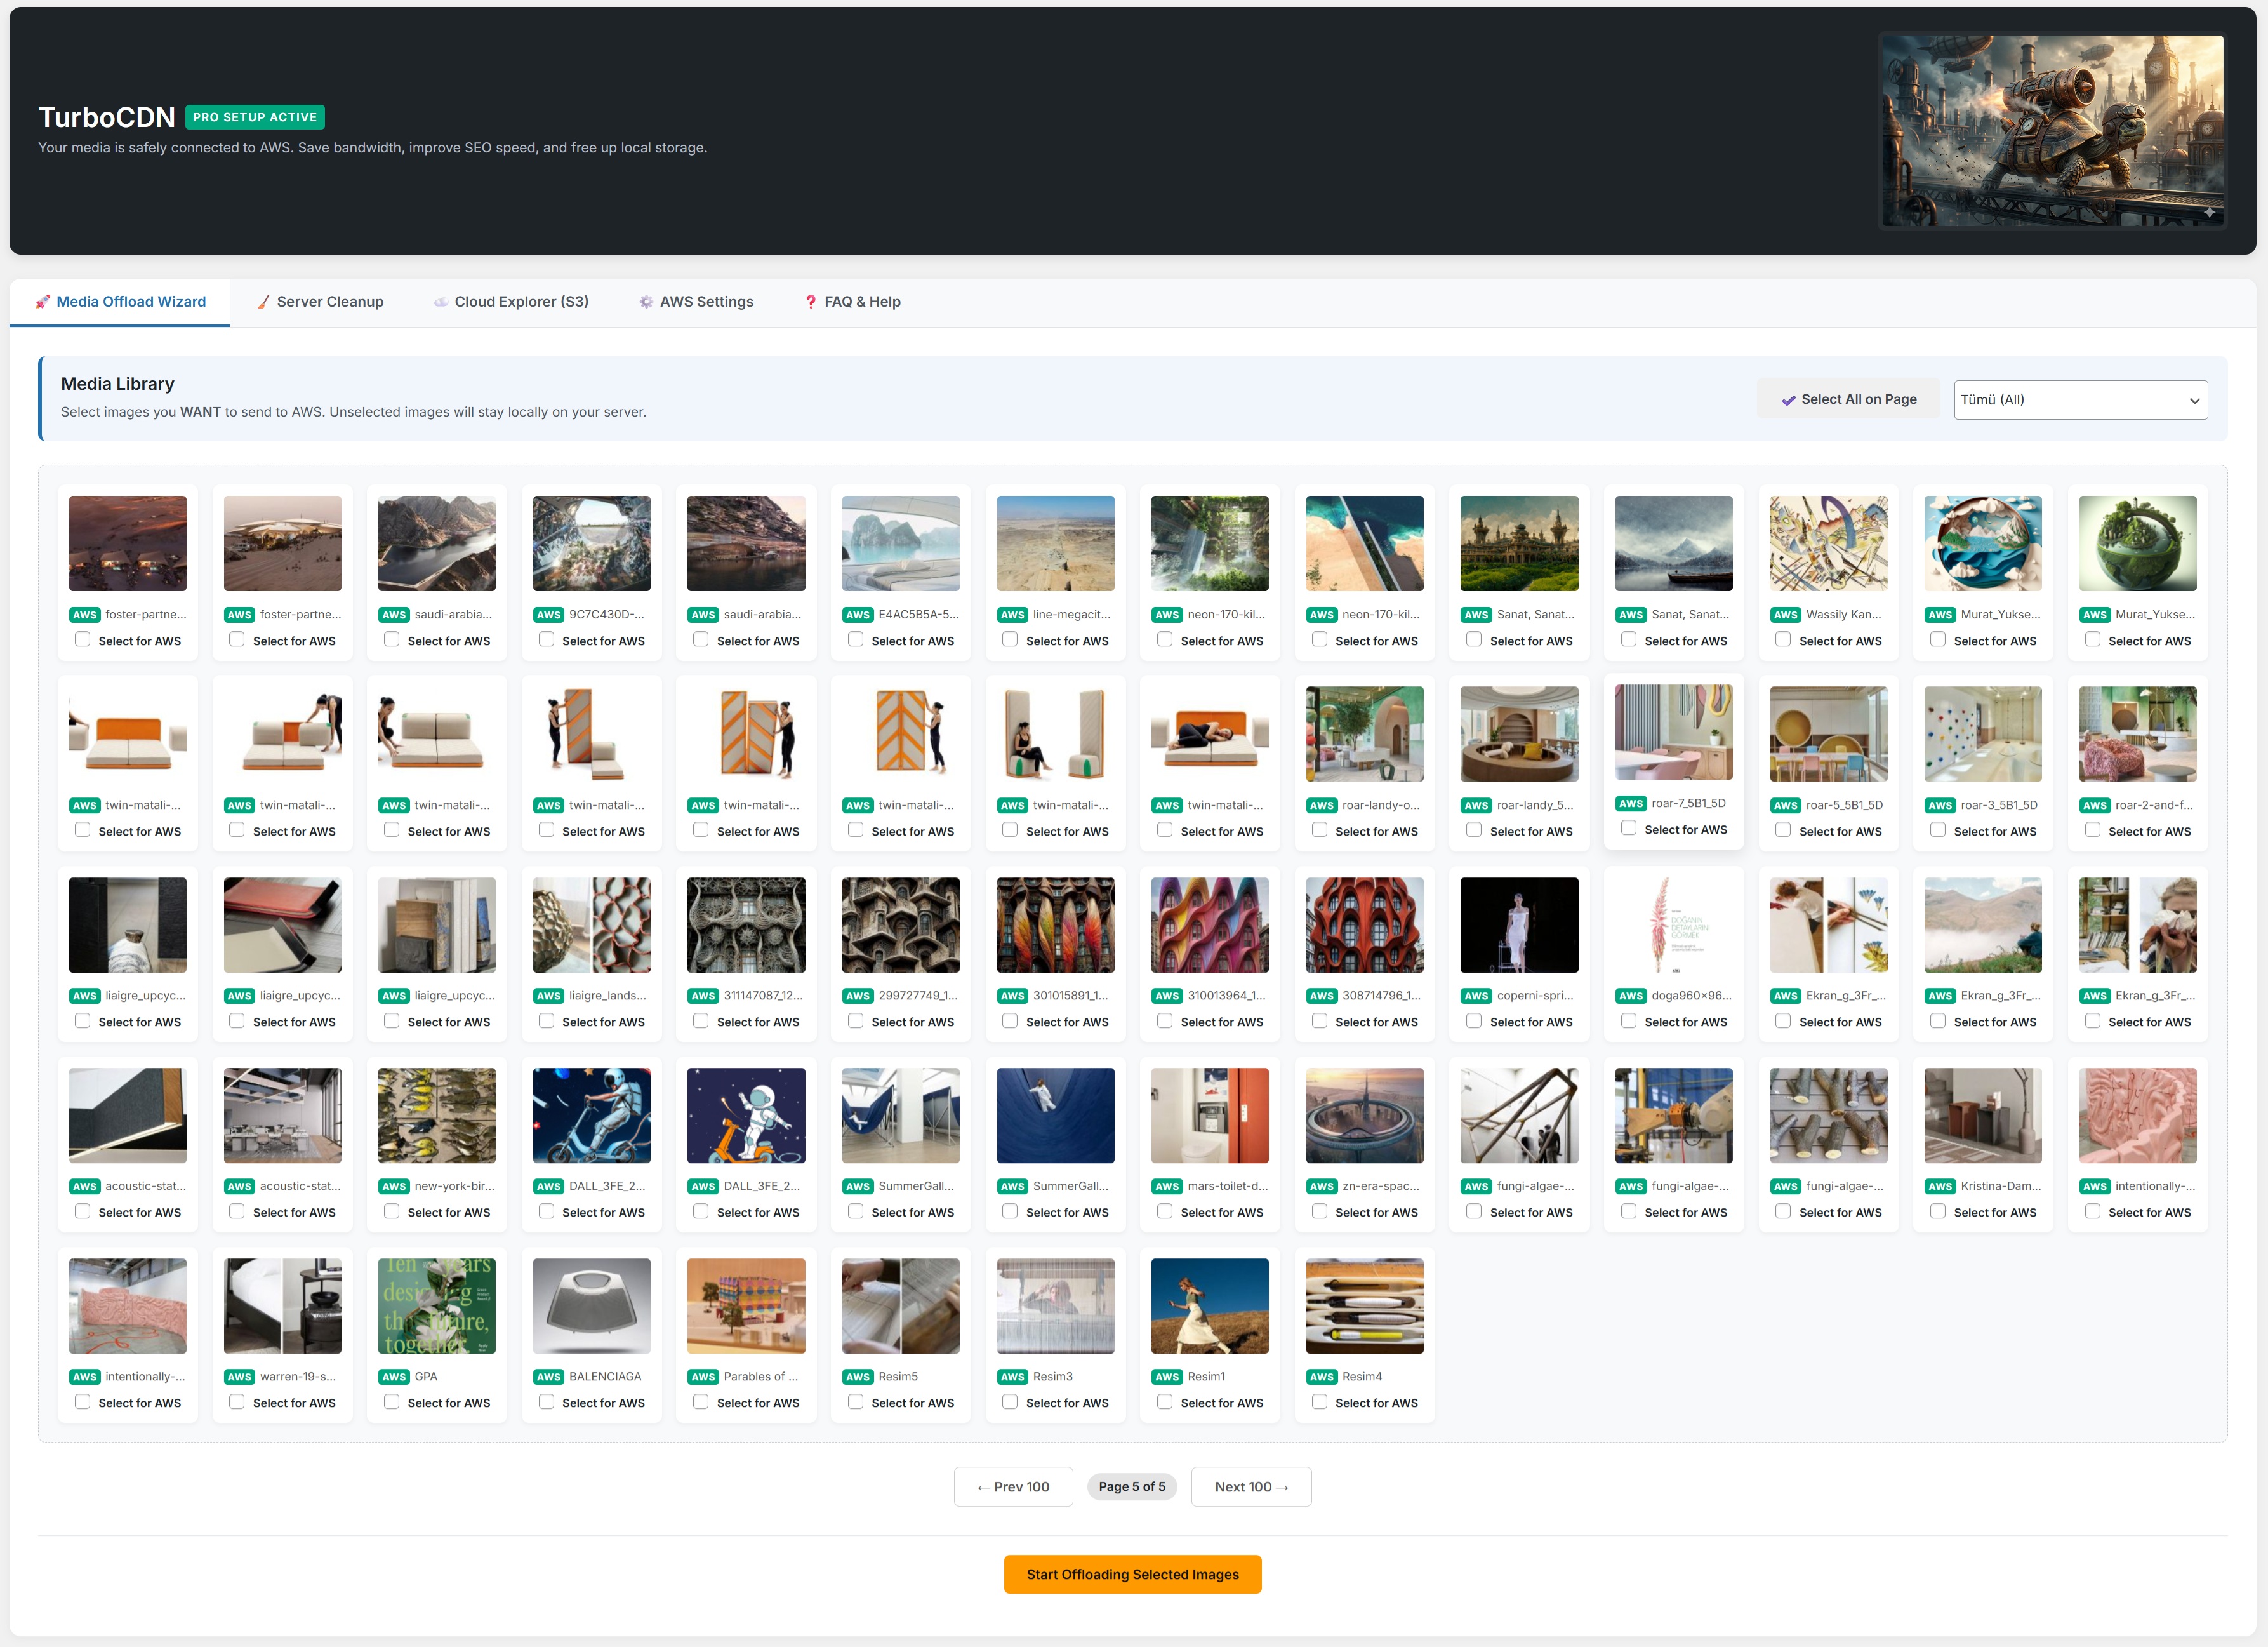
Move your WordPress media to Amazon S3 with a single click, offload your images to the cloud and boost your site with CloudFront. Free yourself from local server limits forever!
-80%
Server Cost
5x
Page Speed
Zero
Broken Links

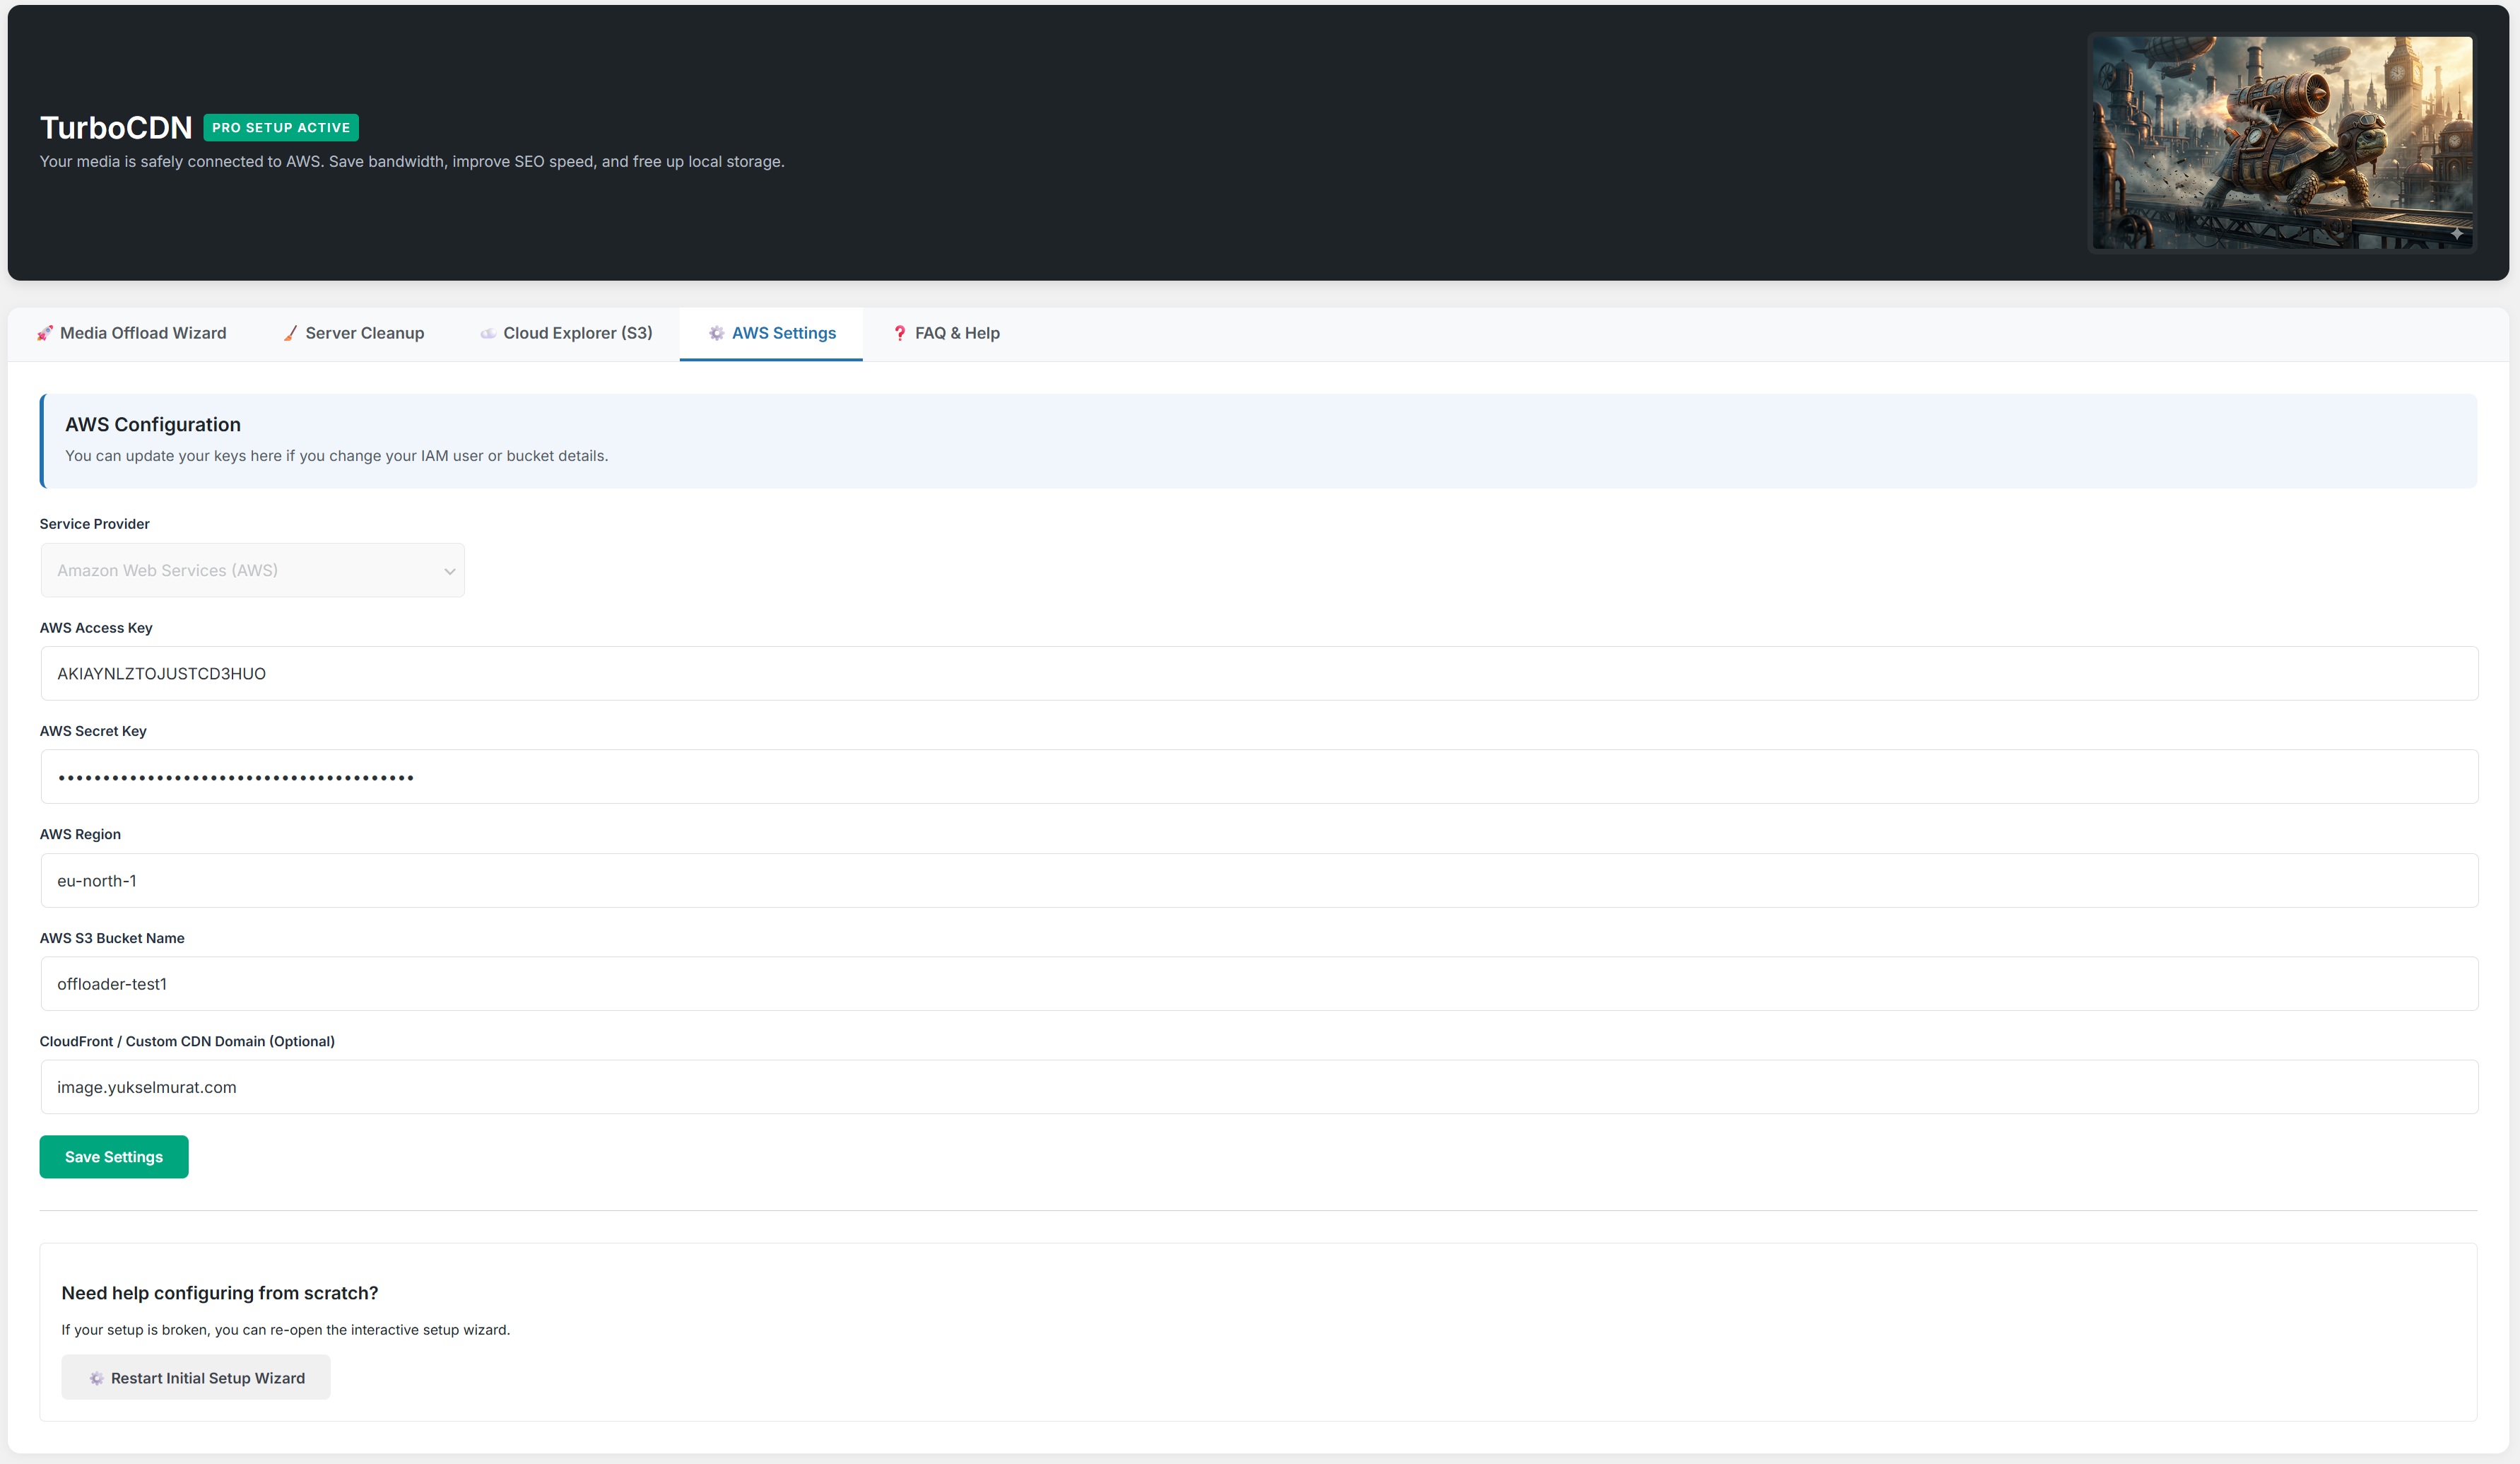
S3 Integration
CloudFront Ready